|

Login - Specialist suppliers
Login - Sales representatives
|
Craft ideas and instructions
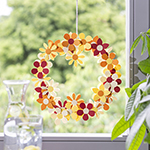
Salamander room decoration
Idea and realisation: Kathleen Hauck
|

enlarged picture
enlarged picture
|
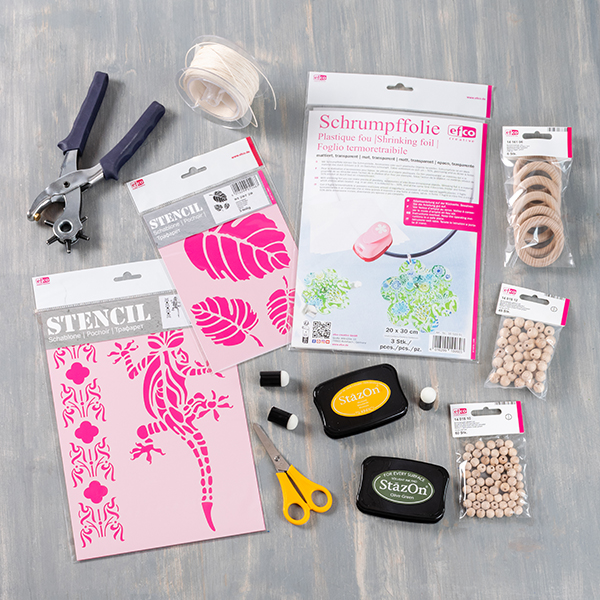
List of materials
| Art. no. | Name of article |
| 1802907 | Craft scissors, round, 13 cm, assorted colours |
| 1801800 | Punch revolver, 6 holes, 20 cm |
| 1051901 | Shrinking foil, matt, 20 x 30 cm, 3 pcs., transparent |
| 9320901 | Stencil, salamander, DIN A4, 2 parts |
| 9320728 | Stencil, leaves, DIN A5, 3 parts |
| 4512007 | Ink pad StazOn, 6 x 9,5 cm, yellow |
| 4512067 | Ink pad StazOn, 6 x 9,5 cm, green |
| 4511303 | Foam stencil brush, 30 x ø 17 mm, 3 pcs. |
| 2002202 | Cord cotton waxed, ø 1 mm, cream |
| 1416106 | Beechwood rings, ø 56 mm, 6 pcs., untreated |
| 1401510 | Balls untreated wood, with hole, 10 mm ø 2,5 mm, 60 pcs., untreated |
| 1401512 | Balls untreated wood, with hole, 12 mm ø 3 mm, 45 pcs., untreated |
| Additional: baking tray with baking paper and oven |
|
Instructions
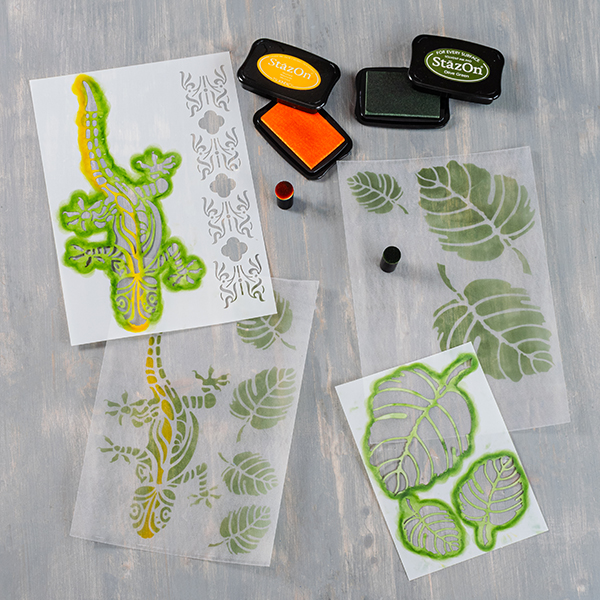
| 1. | Place the stencil on the roughened side and hold it firmly so that it does not slip. Pick up some paint with the stencil dabber and dab it over the desired motif. The colors become more intense and brighter when shrinking, so not much paint is needed. Dab the middle of the salamander's back in yellow and the rest in green. Stencil as many leaves as you like onto the shrinking foil. Leave to dry. |
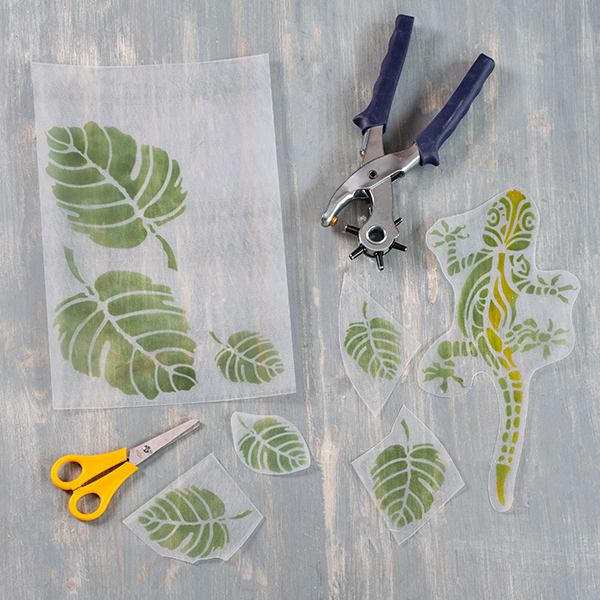
| 2. | First cut the motifs roughly with the scissors and then cut them out round. Do not cut too close to the motif, you can leave some space. Use a hole punch (largest hole) to punch two holes opposite each other in the motifs on the leaves. Make several holes in the salamander (feet, head and tail). |
| 3. | To shrink, place the motifs one by one on baking paper with the rough processed side facing upwards and place in an oven heated to ~ 120°C. The shrinking process takes approx. 2-3 minutes, begins with the bending of the shrinking foil and ends when it has straightened out again. The workpiece can still be shaped while hot. For particularly flat parts, press the hot shrinking foil smooth with light pressure. |
| 4. | Attach a piece of cotton cord to the beech wood ring with a hanging knot. Gradually alternate the wooden beads and shrink-wrap motifs with the cotton cord and knot them together. Cut off any excess ends. |
|
|
|
TipFor a better hold of the stencil, efco Stencil-Fix adhesive for stencils art. no. 9320300 can also be applied to the back of the stencil. After drying, this adhesive is still sticky so that the stencil can adhere to the shrinking foil without slipping. The stencils can be cleaned after use with StazOn Stamp Cleaner art. no. 4512100.
« back to the overview
|
Creative tips
more on the subject »
more on the subject »
more on the subject »
|